Wednesday, July 31, 2013

Mixed Metals Peyote Cuff

So I'm spending a few days in Ventura on a personal stitching retreat. It's great to have serious uninterrupted time to stitch. This next project was a fund raiser from the Pacific Southwest Region EGA last year. 
It's called "Corrugated Mixed Metals Color Ribbon Peyote Cuff" designed by Sand Fibers by Carol Dean Sharpe. I've got another inch or so and the bead weaving will be done. Size 11 Delica beads and size 11 Toho beads are used to get this great texture.  I went to Creative Castle and picked up a clasp for it yesterday so I should have a second piece completed on this retreat. Yippee!

Today is the opening day for the Ventura County Fair. I'm going over to check out the needlework and other craft entries. More yippee!

Tuesday, July 30, 2013

The Winner's Circle

I was privileged to participate in a pilot class for a beaded project. When a designer has a new teaching project, they hold a pilot class to make sure that the supplies and written directions for future classes are correct. Carolyn Sherman has designed a necklace she will be teaching at the EGA national seminar in Louisville and it is just lovely.
It is called "Winners Circle." I haven't done much beading but her class was great and I was able to complete the piece on my own. I thought that that big ring was beaded around a plastic shaper or something. Nope, it's just bead weaving with needle and thread. Once again, I am awed by the creativity of a designer. I've seen the components this necklace uses but would never NEVER have imagined using them this way. Her seminar students are in for a real treat. 

Monday, June 17, 2013

White Hardanger Runner

I really like hardanger. I remember the first time I saw it. It was on a Teresa Wentzler design. I wondered how it was done. I asked about classes at my local needlework shop but couldn't find anyone to teach me. I bought a book but it left out some super-basic information, like should I use a hoop, or how tight to pull the stitches, or how to cut the threads without completely messing up the piece. And what if you cut the wrong thread, then what? Fortunately the old CATS seminars were still making their way around the country and I was able to take a class from Linda Driskell. What a wonderful lady!

First, Linda recommended that beginners especially use a hoop with the fabric held loosely. Most teachers recommend no hoop (or stitching in-hand) but Linda felt it helped to have something to hold onto. Tension in the kloster blocks (the stitches that actually stabilize the piece) need to be medium, firm enough to keep the background fabric in place and to lay consistently flat but not to distort the background fabric too much. Then we talked about using a "magic needle" to open up the thread areas to be cut and about "snugging up" our scissors to get the closest cut without damaging the stitching thread. We talked about weaving bars and doves eyes and picots and filling stitches. It was a great class. It also turned out to be her last. She was leaving the business to take care of her ailing husband. Linda was an important national teacher in the areas of pulled and drawn thread work and she did some great designs that are still available.


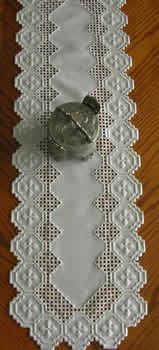
Spring designed by Lori Birmingham stitched by Ruth Plummer

Ironically I never did finish Linda's class piece but I did feel more confident about hardanger. The next year I took a class from Lori Birmingham for this runner named "Spring."


And I actually finished it!


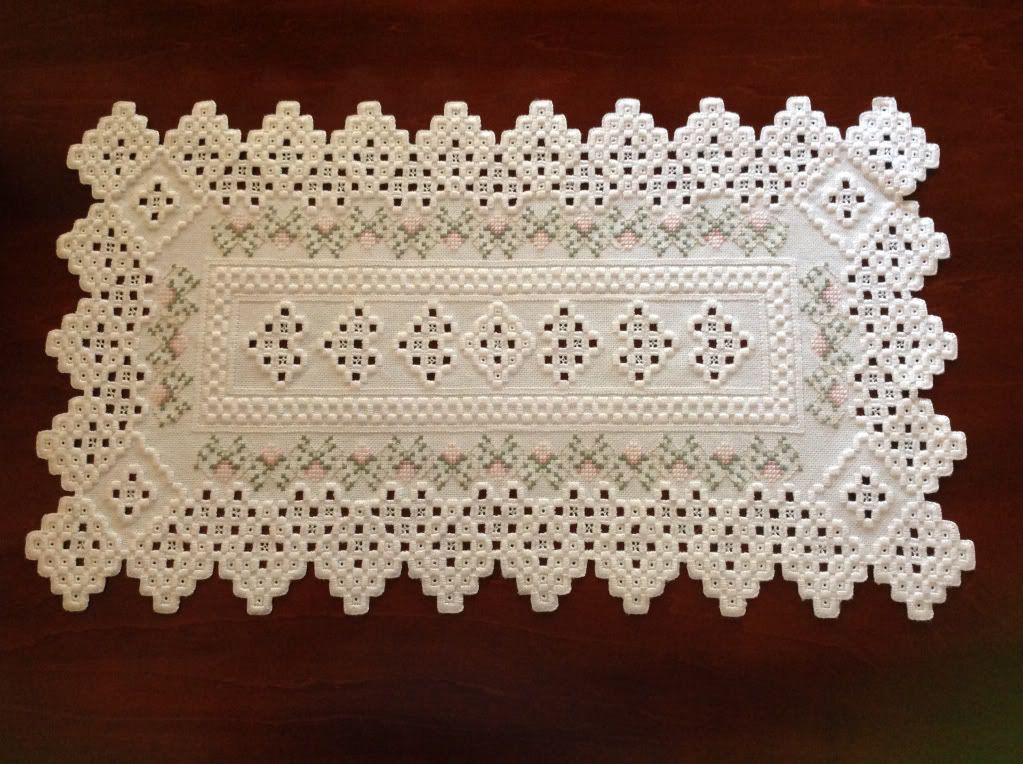
So on to my current piece. Here is the photo of the finished project from Nordic Needle's website. This runner calls for simply weaving the threads into bars to create the lace look without added elements like picots or doves eyes, making it a beginner level piece but, I think, very elegant. Hardanger looks delicate but is tough enough to be used for napkins or even towels.

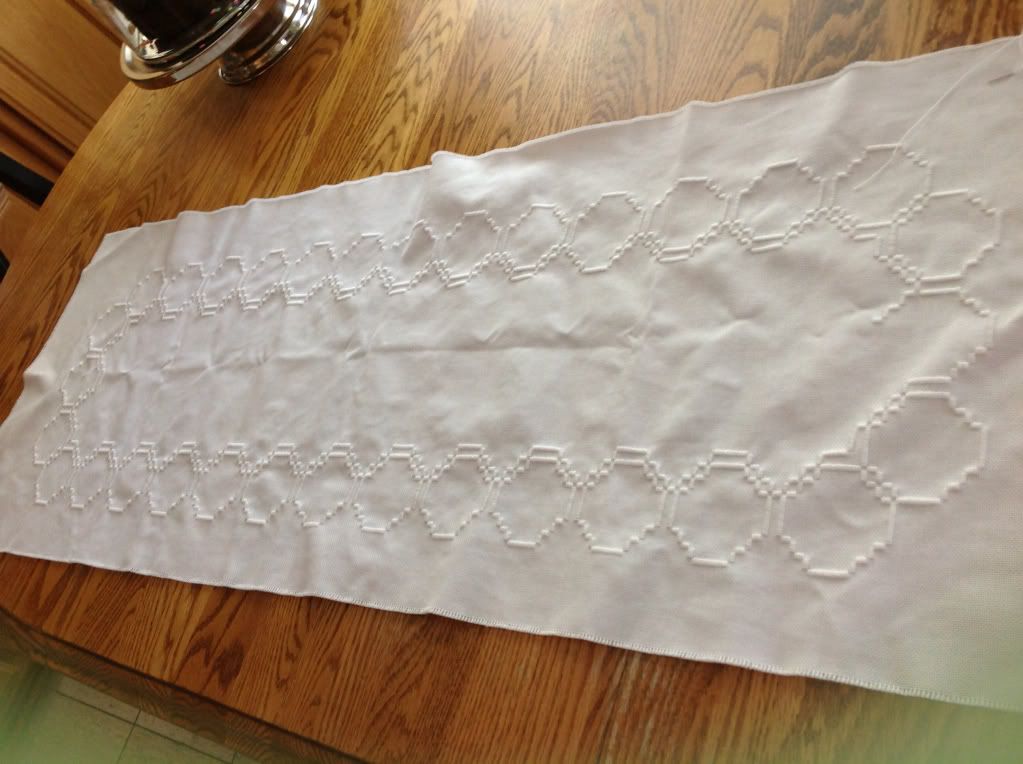
I'm stitching this project in-hand. I don't feel the need to use a hoop for a project this size and I've gotten much better at evaluating my tension that when I was less experienced. It also lets me use a sewing motion instead of a stabbing motion, allowing me to stitch a whole lot faster.


Here's my piece so far. It's not quite as pretty as the final piece yet. The stitching consists of four elements: the satin stitch or kloster block stitches that make up the majority of the design outlines, the buttonhole stitch used to create a more secure edge, the satin-stitched floral motifs, and the woven bars. All the stitching needs to be done before I cut a single thread to begin the drawn thread work. You can fix it if you cut the wrong thread but it's much much easier to count carefully and not make that mistake in the first place!


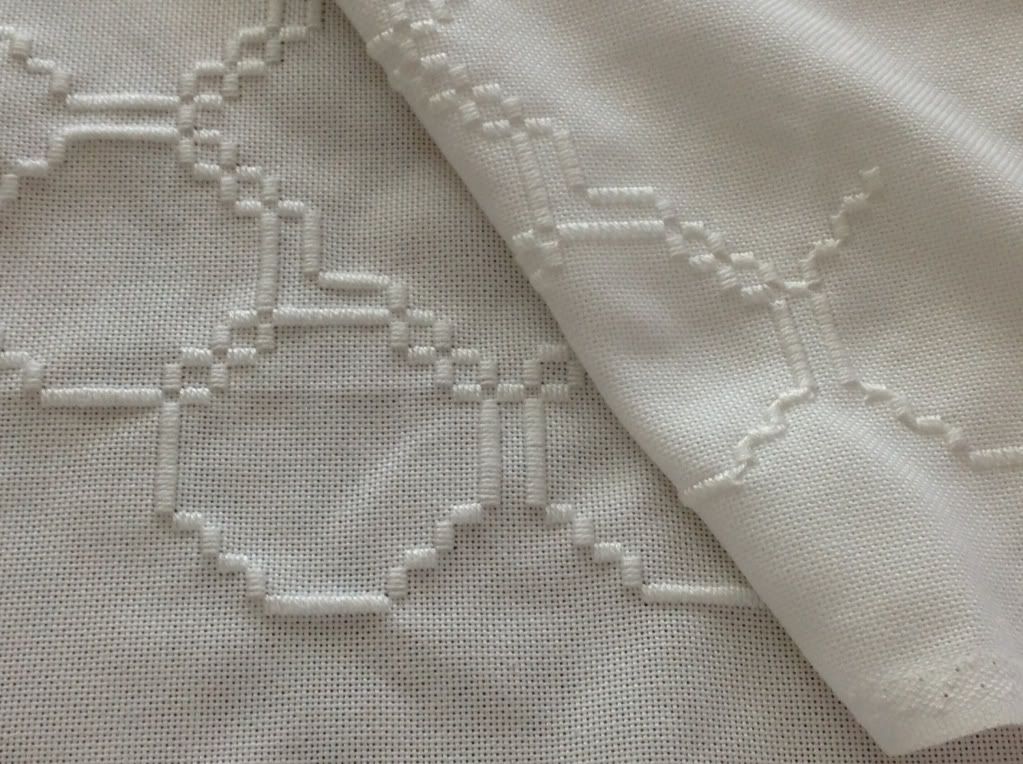
Another challenge with hardanger is making sure I consistently stitch on the correct side! The left of this photo is the front of the piece and the right side is the back. If I don't look carefully it's easy for me to stitch on the wrong side. Then the frog is loose, calling me to rip-it, rip-it. I've already had to rip out an entire half because of a counting error I didn't catch so I don't want to rip out more of my work.


There are amazing photos of hardanger embroidery all over the web. Do a search and be inspired. Nordic Needle in Fargo, North Dakota has a great website with lots of information and they have the best annual seminar ever! For those of us in Southern California, Needlepoints Ltd. in Garden Grove does offer classes in Hardanger on Thursday mornings though it looks like you can arrange private lessons as well.


Saturday, June 8, 2013

Limoges Box Giveaway


Kim at Wisdom with Needle and Thread makes these sweet little porcelain boxes and is giving one away.

Like Kim, I too remember the frozen pot pies. They were 4/$1 when I was in college. I ate them so often I could actually tell the difference between the chicken, turkey, and beef pot pies at a glance. I wonder if that's why I prefer to cook from scratch today....

Go check out her blog. If you win the box, she'll put your initials on it for you.

As my dear daughter said when SHE was in college, "Swe-e-e-e-e-t."
_______________________


If you like offers that include FREE shipping, Beach Cottage Stitchers is taking signups for the Little House Needleworks Mystery Sampler. Free shipping on the charts with Auto-ship. I really don't need another project. I have enough, I have ENOUGH.

But it sounds like so much fun.            Darn it.


In the meantime, I'm still trying to get a new battery for my watch before I finish stringing all the beads. And I've received the last house for Santa's Village, the Christmas Tree Farm.

The house and the roof are WDW threads that I purchased a few weeks ago for this. As I've said before, the designer posts the threads for the piece on the website before the chart is released. But can I find where I put them? Of course not. They must be tucked away in that magical "safe place" that's so safe even I can't find it. That spot is more secure than Fort Knox. Or perhaps it's in Area 51 and the aliens have my thread. Wouldn't you like to see THEIR stitching?

In the meantime, I've begun work on a new hardanger piece. This beginner level kit from Nordic Needle is a white-on-white runner. Stitching the kloster blocks is quite soothing. This is how it should look when it's finished:
Classic White Runner Hardanger Kit


Very pretty isn't it? It's counting but since it's stitched almost entirely with #8 white pearl cotton, I think that it will make a good piece to take on a trip. First I need to complete the inner part of the outer edge, if that makes sense. The very outside edge is done in buttonhole stitch to keep the edge stronger. The section just inside that is all kloster blocks which are essentially satin stitches. If I've counted correctly, the stitches will meet when I get all the way around. In the meantime I check to see if my stitches are lined up by tracing my needle across the piece. If I end up at the mirror image of my last stitches then I'm probably okay.

Monday, June 3, 2013

Making Cluster Beads

I have a lot of projects to do. So of course I started a new one today.


I picked up this kit from a clearance bin at the Black Sheep in Orlando back in 2010. I'd been interested in a few of the Mill Hill watch kits, this was a good price, and I like to have fun things for major holidays. I was gloating over my materials today for Darlene O'Steen's Cranberry Sampler when I ran across this in the same box. I've done a little beading but never this type. It looked like it would make up fairly fast, so I started it in the afternoon.

Basically, you take bugle beads and seed beads and weave them into cluster beads. Then you string the cluster beads you just made onto clear elastic cord along with some bigger pony beads and crystal beads. You attach it all to the watch and wallah!

So you take the stuff on the left and turn it into the beads on the right. What I didn't realize was that the reason the little white seed beads were in two separate bags was because they were different beads! The difference was subtle but once I'd gotten going, very apparent. I made all three blue beads three times, the red ones twice, and I made a total of nine white beads but only ended up with six. But now I know how to make these little cluster beads.


So here's my bead mat (a square from those old velour blankets), my watch, crystal beads, nymo thread, and of course my beautiful Sajou scissors. They look like mother of pearl but they're actually plastic. Really beautiful plastic. And their long flexible blades turn out to be great for beading.

I'll work on the finishing up this watch in the next few days. First I have to replace the battery. Even when I bought it in 2010, it was so old the battery was kaput. I'll have to remember to pull out the stem before I store it to make the battery last longer. I used to think that patriotic jewelry was only good for Independence Day but I then realized that you can wear it for Memorial Day, Flag Day, Labor Day, Voting Day, and Veteran's Day so I should get some fair use out of this.

Sunday, June 2, 2013

Around the World in 80 Stitches Update

I spent a lot of time working on Cleopatra's Cat and still didn't get the darn thing finished. As it was a group correspondence course for the EGA, I still sent it off for evaluation partially done. I enjoyed stitching it but also avoided it, just like homework in high school. Gee, I think I'm grown up and then wham! look I'm not.

Anyway, I'm trying to catch up on Papillon Creation's SAL Around the World in 80 Stitches. Part 12 (of the eventual 24 parts) was recently released. I'm working on part 8 right now.


Check out the greek crosses in the middle.

Four petals of drawn thread.

No drawn thread, just pearl cotton stitches.


This has been a really enjoyable project for me. The stitch diagrams are excellent. Since choosing my colors, I've learned more about color values and would probably make some different choices, but I'm NOT going to restart this project again! Several months ago, my friend Debbie told me about custom q-snap covers she bought for her projects and I decided to get one for this. After all, IF I stay current with this project it'll take two full years so I bought one in fabric that goes with my project.


  It's handy for controlling all that excess fabric. I also have one for my Flower Power (another WIP I'd like very much to get finished). They're fun for seasonal projects, too, like Halloween and Christmas since so many of us stitch for those all year long.


I've also had a good long laugh at my page for my 2013 stitching goals. I was completely out of the running by March 1! Ha! But I still want to complete as many of my WIP's as I can. There is nothing more satisfying than getting a large project completed.

Saturday, June 1, 2013

Santa's Village

I've been working away on the Santa's Village piece from Cottage House.


Here is everything I've done so far. I chose to stitch it on the suggested 32 count Wichelt Lambswool linen, though now I wish I'd gone with a frosty blue color. I'm also using the buttons and will attach them after the piece is washed and pressed.


Here are the individual buildings.
Santa's House

Poinsettia Place

North Pole Post Office
Reindeer Stables-in process


Santa's Stocking Store

Mrs. Claus' Cookie Shop
Each house requires one or two skeins of a specialty floss so I've been adding to my stash at a nice slow pace. The threads needed for the next house are posted on the Country Cottage Needleworks website before the chart is released so I have time to have it ready before I receive the chart. I'm getting monthly shipments from Beach Cottage Stitchers and am very happy with the service.

Friday, May 31, 2013

Avoiding Injuries While Stitching

No, I haven't hurt myself. Not yet, anyway. I write the blog for my EGA chapter, Baldy View in Ontario, California. Our May meeting included a presentation by a physical therapist about how to avoid repetitive movement injuries while stitching. Some of you may find it useful.

http://baldyviewega.blogspot.com/


Tuesday, April 23, 2013

Stitching on a Plane

I realized that I was a serious stitcher when I started spending more time planning what I'd stitch on my trip than what I'd wear. I'm on a trip now and here's what I chose to stitch on the plane.
It's the Halloween Mantle from Bent Creek. It's on 18-count linen and stitched with pearl cotton so it's easy to see even in the inferior plane lightning. I need to finish up the witch portion and I'll be done. I'm thinking it will make a nice pillow.

Thursday, April 18, 2013

Cleopatra's Cat

I have finally gotten back to working on my cat. If you looked at my stitching plans for 2013, you'd see that, in this fourth month of the year, I am about four months late.

Most stitchers would probably consider me right on schedule!


Here she is now. Cleopatra's Cat is a group correspondence course from the Embroiderers' Guild of America. She is charted for blue tones but I changed her over to red because I like red better and have a lot of it in my stash. I changed her eyes from gold to green.

The technique is called or'nue. It's a, get this, "laid filling stitch." Wha-a-a-t?

It works like this: you put down ("lay") metallic thread, then stitch over it to form the design. The original model was stitched on white-with-gold-metallic canvas. I used that same canvas, though it doesn't show up in the photos very well. And her face looks weird in this photo because I've only got part of the stitching done. She uses threads of wool, silk, cotton floss, pearl cotton, solid colors and over-dyes. She also uses just a little red metallic in addition to the gold thread.


 Here is the original photo from the EGA website.
You can see how different the design looks in a color change.
 Here are a few close-up photos of the various sections. If you click on them, they should get bigger and show more detail. See the gold flecks on the canvas? It looks really pretty in real life.

Soft little kitty feet.

This is over-dyed floss and gold thread.


The eyes will have a metallic gold iris.


Several of my EGA friends are doing this project also. We all made different choices. One stitched her on 24-count congress cloth instead of the 18-canvas, one stitched her on black canvas, etc. If I can, I'll get a photo of as many of the cats together as possible. Stitching with friends is just one of the many good things about being an EGA member.

I've been working on other projects as well. I still have to post my photos of Santa's Village from Cottage House Needleworks. I've also completed a cross-stitched quilt square for World of Charity Stitching. I'll get more photos up soon.

Monday, March 4, 2013

Christmas in March

I seem to have Christmas in my needlework right now. I signed up for the Santa's Village series from Country Cottage and am doing a SAL with a local group. I'll post pictures soon. I also just finished up four ornaments. The first three are a set of perforated paper gingerbread houses from the book "A Cross-Stitch Christmas: Handmade Holiday," and they have lots of beads.

Here is the first one. I added the Santa buttons for fun. I had three red bird buttons so each ornament got a bird.


Then there is this next little house. I opted for snowflakes on the roof. The bird is tucked on the back by the snowman.


This last one has a snowman button in the doorway on the front and it's little bird perched on the doorway. I have two different trees on the back. These little guys were more work than I'd anticipated but they were fun to make!


Then this ornament is actually a pattern from by EGA magazine of December 2011. My local EGA chapter, Baldy View, gave us all the materials for this as a gift. The kit even included precut cardstock, padding, and backing material. They even twisted up floss for the cording! Thanks, guys! It turned out really cute!

Friday, January 18, 2013

Cirque des Cercles

Here it is, all washed and pressed. This Ink Circles design was stitched on 25-count mushroom lugana over 1 thread. I really like how it turned out.

Tuesday, January 15, 2013

Santa's Village

Here is the first house in the collection, Santa's House. I'm picking up the Crescent Colors floss for the house tomorrow. This was two days of stitching.

Saturday, January 12, 2013

Santa's Village from Country Cottage

I found out about this SAL for this adorable project, and then discovered that it was on sale at Beach Cottage Stitchers. I ordered the lambswool linen to stitch it all on one big piece.
Here are the first two houses. More information is at Country Cottage Needleworks. I'll be getting a chart each month. I've got a little bit started, but I don't my camera handy so I'll post photos when I get a chance. Unfortunately I discovered the SAL too late and it was already full.

I made my stitching plans for 2013 and can now report that I have done a big nothing on them. Cleopatra's Cat, which could not be finished by the middle of January anyway due to waiting for my thread, had not been touched. I have been working on my Ink Circles design because I was so close to getting it and it is finished and soaking in Orvus right now.

Saturday, January 5, 2013

Christmas Stockings

Before I put all the Christmas things away, I thought I'd show off my stockings.

 I love seeing these over the fireplace. My stocking is the red plush from my childhood. Most are from felt embroidery kits.


Michal's stocking is the oldest dating from 1988. Kaitlyn's is next oldest, dating from 1990. Kaitlyn's looks a bit ragged because she loved her stocking and refused to let me put it away one year. Leigh's was made in 1996.


Timothy's stocking was made in 1998 and Alfred's in 1991. Most years I hang them in story order: Santa in his workshop (Leigh), Santa in his sleigh (Kaitlyn), Santa on the roof (Michal), and Santa in the house (Alfred). Tim's big Santa and my red plush went in some random place.


  When my daughter Michal got engaged to Jonathan in 2009 I decided to make him a stocking too. I wanted to do a cross stitch stocking and he chose this design "Bad Landing" from the book "A Cross Stitch Christmas/Season of Joy." It was my first all-over cross stitch.

The quality of this stocking is so much more than the felt ones that I toyed with the idea of making everybody a new stocking. I've decided that I won't do that after all. Each stocking represents where my skill level was at the time and really, each is done very well. They hold such sweet memories, too, of my children's excitement on so many Christmas mornings.

But I really should make a stocking for me.


For needleworkers Christmas is all year long. I've decided to start the Country Cottage Needleworks Santa's Village, a monthly mystery series. I also picked up some of The Victoria Sampler Gingerbread series charts at the Needlepoints Ltd. after-Christmas sale. Cute, cute, cute!